Hat knitting pattern with Straight Needles: Free Brain Hat Knit Pattern Inside!
Brain Hat Shorts Video | Basic Knitting Supplies | Knitting Abbreviations | Free Hat Knitting Pattern | Bind off using Stright Needles | Frequently Asked Questions
Hello, my friends! I hope you’ve been enjoying my knitting blogs. Today, I’m excited to share a tutorial on knitting a stylish brain hat using straight needles. Indeed, my friends, during the winter season, a hat on your head is essential to complete your ensemble.
Without it, all the warm clothes you put on may feel somewhat incomplete. The hat holds a unique and crucial position in winter attire. Nowadays, you can find a wide variety of beautiful and stylish hats in the market.
In today’s post, I have a delightful adult-sized hat-knitting pattern to share. This hat can be knit for both men and women, and its simple pattern adds a touch of elegance and style.
We have knitted a variety of beautiful hats for babies, men, and women using straight needles. You can take a look at these free hat knitting patterns.
Table of Contents
Basic Knitting Supplies for Hat
Knitting needle size- 10 Number or 3.25 MM Straight Needles
Knitting yarn – 70 gram 8 Ply Vardhman Wool o Wool
Knitting Abbreviations
SL – Slip
K – Knit
P – Purl
STS – Stitches
K2tog – Knit 2 sts together
P2tog – Purl 2 sts together
T3B – Twist 3 sts from back (Slip 2 sts onto cable needle and hold behind work then P1 from left-hand needle then K2 from Cable needle).
T3F – Twist 3 sts from front (Slip 2 sts onto cable needle and hold in front work then P1 from left-hand needle then K2 from Cable needle).
Knit a Stylish Hat with Straight Needles
Below, you’ll find the complete pattern for this brain hat, and you can easily adjust it to knit a hat of any size. Let’s dive into the process of knitting this beautiful hat.
Skill – Intermediate

Knitting Rib Stitch Border
This hat I’ve made for adults. To knit this cap, I cast on 110 stitches with double thread. First, we will knit the cap’s border. I knit the border using simple 2×2 rib stitches.
Row 1 ( Right Side ) – * K2, P2 * repeat from * to * till the end of the row
Row 2 ( Wrong Side ) – Knit in knit & Purl in purl
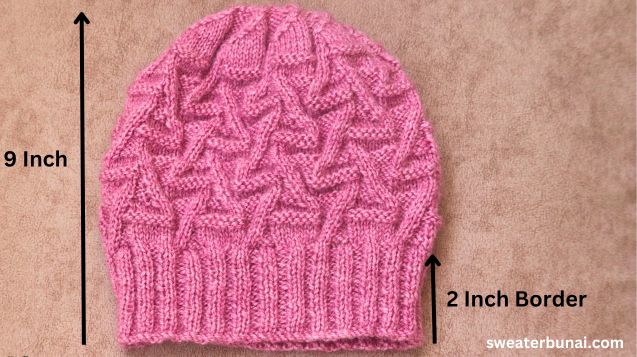
I knit a 2-inch ( 20 Rows ) long border, but you can adjust the length as per your preference.
Wrong Side – Purl all stitches and increase by 20 stitches across the entire row.
After completing the border, stitches have been added from the wrong side. In this cap, I’ve added 20 stitches in total. Now I have 130 stitches on my needle.
Free Knitting Pattern for Hat on Straight Needles
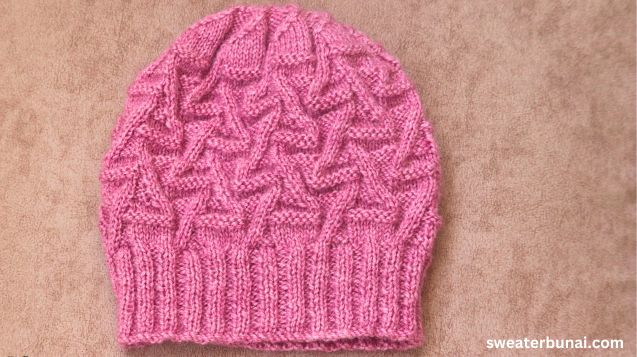
Now we will add a design to the cap. In this hat pattern, we knit the number 7 from both the right and wrong sides. But after finishing the hat, the pattern looks like a brain. So, we call it the brain hat knit pattern.
This is a very important part of the cap. The design you choose will make your cap look attractive. Here, I’ve added a beautiful pattern that completes in 20 rows, and you need to take stitches in multiples of 14 to knit it.
We have 130 stitches here, so to adjust your design, you’ll need to place 2-2 stitches on both edges. So, let’s start adding the pattern to the cap.
Row 1 – SL1, K1, * K7, P4, T3B * repeat from * to * …………. last 2 sts K2
Row 2 – SL1, P1, * K1, P2, K4, P7 * repeat from * to * ………………. last 2 sts P2 ( Knit in knit & Purl in purl, All wrong side apply same rule )
Row 3 – SL1, K1, * K7, P3, T3B, P1 * repeat from * to * ………….. last 2 sts K2
Row 4 – SL1, P1, * K2, P2, K3, P7 * repeat from * to * …………. last 2 sts P2
Row 5 – SL1, K1, * P9, T3B, P2 * repeat from * to * ……………. last 2 sts K2
Row 6 – SL1, P1, * K3, P2, K9 * repeat from * to * …………… last 2 sts P2
Row 7 – SL1, K1, * K7, P1, T3B, P3 * repeat from * to * …………. last 2 sts K2
Row 8 – SL1, P1, * K4, P2, K1, P7 * repeat from * to * ………….. last 2 sts P2
Row 9 – SL1, K1, * K7, T3B, P4 * repeat from * to * …………….. last 2 sts K2
Row 10 – SL1, P1, * K5, P9 * repeat from * to * …………. last 2 sts P2
Row 11 – SL1, K1, * T3F, P4, K7 * repeat from * to * ……………. last 2 sts K2
Row 12 – SL1, P1, * P7, K4, P2, K1 * repeat from * to * ……………. last 2 sts P2
Row 13 – SL1, K1, * P1, T3F, P3, K7 * repeat from * to * ………… last 2 sts K2
Row 14 – SL1, P1, * P7, K3, P2, K2 * repeat from * to * …………… last 2 sts P2
Row 15 – SL1, K1, * P2, T3F, P9 * repeat from * to * ……………… last 2 sts K2
Row 16 – SL1, P1, * K9, P2, K3 * repeat from * to * …………… last 2 sts P2
Row 17 – SL1, K1, * P3, T3F, P1, K7 * repeat from * to * ……….. last 2 sts K2
Row 18 – SL1, P1, * P7, K1, P2, K4 * repeat from * to * …………… last 2 sts P2
Row 19 – SL1, K1, * P4, T3F, K7 * repeat from * to * ……… last 2 sts K2
Row 20 – SL1, P1, * P9, K5 * repeat from * to * ……………… last 2 sts P2
Repeat rows 1 to 20 two and a half times or the length you require. I have knit 50 rows.
Bind off Knitting Pattern for Hat
The hat’s length is complete, and now we need to bind off it. I’ve already bind off the hat from both sides, and it took me 15 rows to do it.
When we bind off, the hat’s length will increase by about 2 inches, so remember that while working on the hat. Get below the bind-off knitting pattern.
Right Side – K2tog, * K7, K2tog, P5 * repeat from * to * …………….. last 2 sts K2tog
Wrong Side – SL1, * K5, P2tog, P6 * repeat from * to * ………….. last sts P1
Right Side – SL1, * K5, K2tog, P5 * repeat from * to * ……………… last sts P1
Wrong Side – SL1, * K5, P2tog, P4 * repeat from * to * ……………. last sts P1
Right Side – SL1, * K3, K2tog, P5 * repeat from * to * …………… last sts P1
Wrong Side – SL1, * K5, P2tog, P2 * repeat from * to * …………… last sts P1
Right Side – SL1, * K1, K2tog, P5 * repeat from * to * ……………. last sts P1
Wrong Side – SL1, * K5, P2tog * repeat from * to * ……………… last sts P1
Right Side – SL1, K1, * P4, K2tog * repeat from * to *
Wrong Side – * P2tog, K3 * repeat from * to * ………… last 2 sts P2
Right Side – SL1, K1, * P2, K2tog * repeat from * to *
Wrong Side – * P2tog, K1 * repeat from * to * ……………. last 2 sts P2
Right Side – K2tog, K2tog, K2tog ………………
Now I have only 10 stitches left on my needle.
Wrong Side – Purl all sts
Right Side – Remove all stitches over the first stitch.
Then secure it and sew the hat from the wrong side.
Unisex Brain Hat Knitting Pattern Video
Share your Knitting Project with us
I hope you enjoy the hat knitting tutorial and try it for your next knitting project. If you have any questions about the brain hat knitting pattern, feel free to ask, and we will try to answer them quickly.
If you’re working on a knitting project, please share it with us on our Facebook page. We would love to see what you’re making!
Please explore alternative knitting patterns for your upcoming project
Brown hat knit using straight needles
Frequently Asked Questions
Can we knit a brain hat with straight needles?
Yes, you can knit a hat with straight needles. In this post, we shared the hat-knitting pattern using straight needles.
How many stitches need to be cast on for a hat on straight needles?
In this post, we shared a cap pattern for adults ( 23 Inches ) & took 110 stitches but the number of stitches can vary depending on the head size and the gauge. So measure the head circumference and the gauge to ensure a proper fit.
What size knitting needles do I need for a hat?
We used 10 Number Straight Needles to knit this hat.
Is a PDF available for the hat knitting pattern?
There is no PDF version available for the knitting pattern. You can copy and paste the pattern, and then proceed to print it if needed

Thank you so much for sharing your hat pattern. Will enjoy knitting it. Blessings to you.
Most welcome, Keep connecting with us.
Thanks Reta, Please share cap photo on FB group also.
Thank you so much for this gorgeous pattern. God bless you for sharing!
Most welcome,
do we use double thread for the whole hat?
You can try