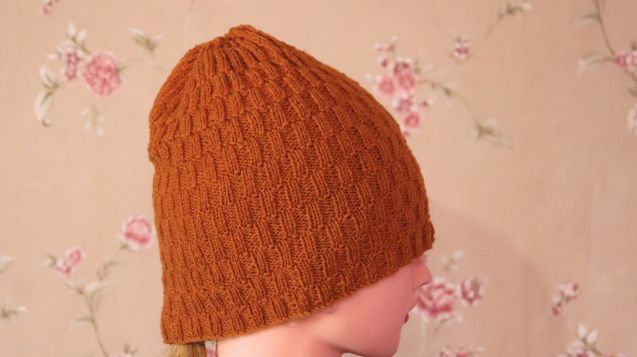
Are you looking for a beginner’s first knitting project? Try this simple knit-purl stitch hat pattern.
Today, we’ll learn how to knit a simple double-sided hat. It uses basic knit & purl stitches. You can knit this hat for any age group, male or female.
I’ve included a video tutorial below to guide you through each step. Let’s get started!
Table of Contents
Materials You Need for the Hat
Knitting Yarn– 4ply (50 Grams) Vardhman Wool.
Knitting Needles– 11 No straight needles (3 MM).
Abbreviations Guide for Knit-Purl Stitch Hat
SL(P) – Slip Purl Wise
K – Knit
P – Purl
STS – Stitches
RS – Right Side
WS – Wrong Side
K2tog – Knit 2 sts together
P2tog – Purl 2 sts together
Simple Knit – Purl Stitches Hat Pattern for Beginners
Skill Level– Beginner
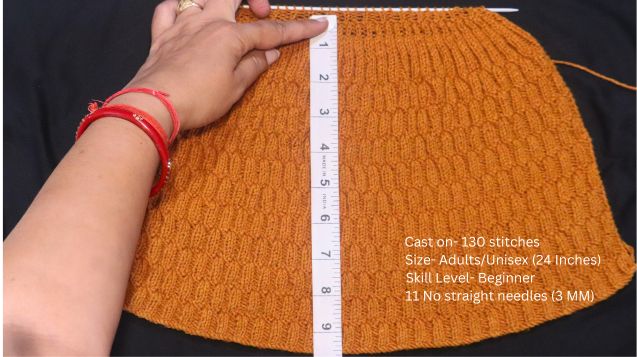
Size– Adults/Unisex (24 Inches)
Cast on– 130 stitches
This double-sided hat uses a very simple 2×2 rib stitch pattern, making it easy for beginners to knit.
This is a 2×2 rib stitch pattern, so there’s no need to knit a separate border for the hat. The pattern repeats every 16 rows, and the instructions are below for you to follow.
Row 1 – SL1 (P), * K2, P2 * repeat from * to * …………….. last sts P1
Row 2, 3, 4, 5, 6, 7, 8 – Same as row 1
Row 9 – SL1 (P), * P2, K2 * repeat from * to * …………….. last sts P1
Row 10, 11, 12, 13, 14, 15, 16 – Same as row 9
Repeat these 16 rows & complete the length of the hat, Here I have knitted 8 inches.

Easy Bind-Off for Hat Pattern
When you bind off, the length of the hat will increase by about 1.5 inch. The complete bind-off pattern is given below.
Row 1 ( RS ) – SL1 (P), * K2, P2tog * repeat from * to * ………… last sts P1 (98 sts remaining)
Row 2 ( WS ) – SL1 (P), * K1, P2 * repeat from * to * ………….. last sts P1 ( Knit in knit & Purl in purl )
Row 3 ( RS ) – SL1 (P), * K2, P1 * repeat from * to * ………….. last sts P1
Row 4 ( WS ) – Same as row 2
Row 5 ( RS ) – SL1 (P), * K2tog, P1 * repeat from * to * …………. last sts P1 (66 sts remaining)
Row 6 ( WS ) – SL1 (P), * K1, P1 * repeat from * to * …………. last sts P1
Row 7 ( RS ) – Same as row 6
Row 8 ( WS ) – Same as row 6
Row 9 ( RS ) – SL1 (P), * K2tog, P2tog * repeat from * to * …………. last sts P1 (34 stitches remaining)
Row 10 ( WS ) – SL1 (P), * K1, P1 * repeat from * to * …………….. last sts P1
Row 11 ( RS ) – Same as row 10
Row 12 ( WS ) – Same as row 10
Now 34 stitches are remaining. Pick up all the stitches onto a sewing needle and secure them tightly. Then, sew the hat from top to bottom. Your double-sided Knit – Purl Stitch Hat is now ready to wear!
Simple Hat Pattern Step-by-Step Videos
Show Us Your Finished Hat Pattern
I hope you liked my simple knit-purl stitch hat pattern! I regularly share knitting projects like this, especially designed for beginners.
If you’re working on any knitting project, feel free to share it in our FB group. We’d love to see your creations!
Simple Knit Hat: Common Questions
Can I knit this hat for kids?
Yes! Just cast on fewer stitches and shorten the length of the hat to fit smaller heads.
What’s the purpose of the slip stitch at the beginning of each row?
The slip stitch helps create a neat, clean edge that makes seaming easier when you finish the hat.
What does “double-sided” mean in this pattern?
You can wear it on both sides.
Is this hat pattern suitable for beginners?
Yes.

Leave a Reply