Sunayana Lace Hat Knitting Pattern: A Perfect Project for Every Knitting Skill Level.
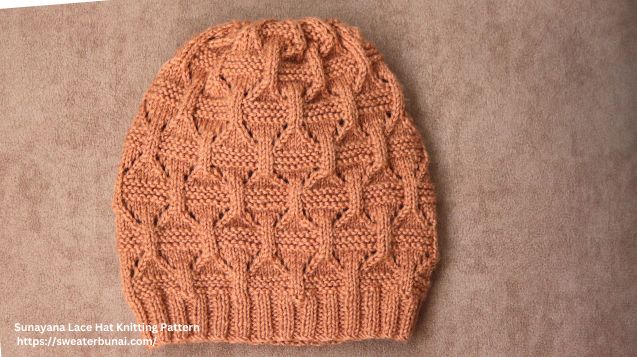
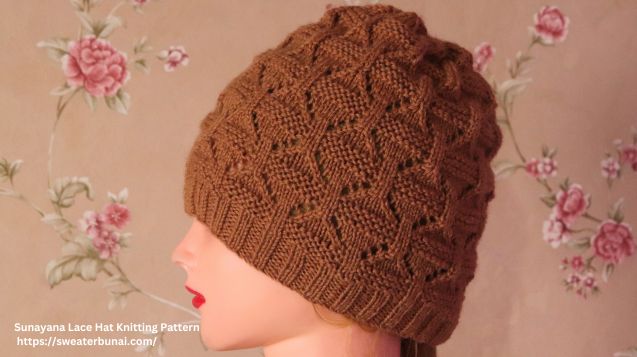
Today, I’m excited to share a beautiful lace hat-knitting pattern with you all! This is a versatile unisex hat, knitted in an adult size, but you can easily adjust it to fit any size.
Below, I’ve provided a step-by-step guide for knitting this lace hat, and there’s also a video tutorial linked for extra help. So, let’s get started on making this gorgeous lace knit hat!
Table of Contents
Essential Knitting Materials
Yarn- Vardhman Woolista Merino (100%) Wool Yarn.
Knitting Needle- 10 (3.25 mm) number straight needles.
Optional materials include a measuring tape, scissors, and a darning needle.
Abbreviation Guide for the Lace Hat Knitting Pattern
P3tog: Purl 3 sts together
P2tog: Purl 2 sts together
K2tog: Knit 2 sts together
SL(P): Slip(Purl Wise)
K: Knit
P: Purl
STS: Stitches
RS: Right Side
WS: Wrong Side
SSK: Slip, Slip, Knit (Slip one stitch knitwise, Slip the next stitch knitwise, Insert the left needle into the front of these two slipped stitches & Knit them together through the back loop).
How to Knit a Gorgeous Lace Hat: Free Pattern and Instructions

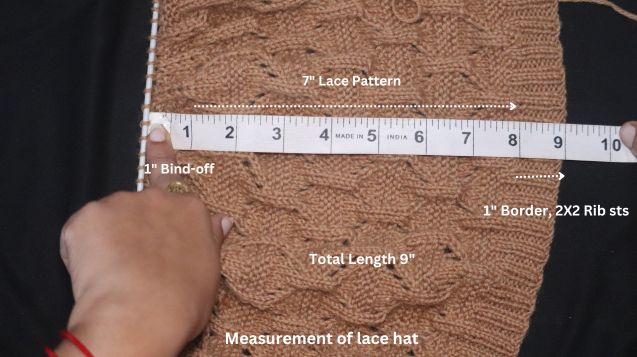
Size: Adult (To fit head circumference: 21-22”/19-20”, Length from brim to top: approximately 9”.
Skills: Intermediate/Beginner.
Skills used in the pattern: Casting On, 24 rows repeat lace pattern, 2X2 Rib sts ( For Border), Decreases & Sewing Together a Seam.
Cast on: 114 sts.
How to Knit the Perfect Border for Lace Hat
Here, the border is made using a 2×2 rib stitch. The first and last stitches on each side are knitted purl-wise. The border pattern is given below.
Row 1 (RS): * P2, K2 * repeat from * to * …………. last 2 sts P2
Row 2 (WS): SL1 (P), K1, * P2, K2 * repeat from * to * …………. last 4 sts P2, K1, P1
Repeat these 2 rows until you have a 1-inch border. I knitted a total of 10 rows for the border.

Knitting a Lace Hat: Free Pattern and Detailed Instructions
For this hat, I’ve used a beautiful lace hat knitting pattern. It’s a 24-row repeat design, and to knit this pattern, you need 10 + 4 stitches. Below, I’ve explained in detail how to adjust this pattern in the hat. The lace knitting pattern is given below.
Row 1(RS): SL1 (P), P1, * K2, P8 * repeat from * to * ………………… last 2 sts P2
Row 2(WS): Purl all sts
Row 3(RS): Same as row 1
Row 4(WS): Purl all sts
Row 5(RS): Same as row 1
Row 6(WS): Purl all sts
Row 7(RS): SL1 (P), K1, * K2, Yo, SSK, K4, K2tog, Yo * repeat from * to * ………… last 2 K1, P1
Row 8(WS): Purl all sts
Row 9(RS): SL1 (P), K1, * K3, Yo, SSK, K2, K2tog, Yo, K1 * repeat from * to * …………last 2 sts K1, P1
Row 10(WS): Purl all sts
Row 11(RS): SL1 (P), K1, * K4, Yo, SSK, K2tog, Yo, K2 * repeat from * to * …………………last 2 sts K1, P1
Row 12(WS): Purl all sts
Row 13(RS): SL1 (P), P6, * K2, P8 * repeat from * to * …………… last 7 sts K2, P5
Row 14(WS): Purl all sts
Row 15(RS): Same as row 13
Row 16(WS): Purl all sts
Row 17(RS): Same as row 13
Row 18(WS): Purl all sts
Row 19(RS): SL1 (P), K4, K2tog, Yo, * K2, Yo, SSK, K4, K2tog, Yo * repeat from * to *…………… last 7 sts K2, Yo, SSK, K2, P1
Row 20(WS): Purl all sts
Row 21(RS): SL1 (P), K3, K2tog, Yo, K1, * K3, Yo, SSK, K2, K2tog, Yo, K1 * repeat from * to * …………………. last 7 sts K3, Yo, SSK, K1, P1
Row 22(WS): Purl all sts
Row 23(RS): SL1 (P), K2, K2tog, Yo, K2, * K4, Yo, SSK, K2tog, Yo, K2 * repeat from * to *……………. last 7 sts K4, Yo, SSK, P1
Row 24(WS): Purl all sts
Repeat these 24 rows until you reach the desired length of the hat. I knitted a total of 8 inches (1-inch border + 7-inch lace design).
How to Decrease in a Lace Hat Knitting Pattern: Complete Guide
The hat is decreased over 8 rows, which will add about 1 extra inch to the total length. So, make sure to account for this when measuring the length of the hat. The decrease pattern for shaping the top of the hat is given below.
Row 1(RS): SL1(P), P1, K1, SSK, P6, * K2tog, SSK, P6 * repeat from * to * …………… last 3 sts P3
Now I have 93 stitches remaining.
Row 2(WS): Purl all sts
Row 3(RS): SL1 (P), P1, K1, SSK, P4, * K2tog, SSK, P4 * repeat from * to * ………………Last 4 sts P2tog, P2tog
I now have a total of 70 stitches remaining.
Row 4(WS): Purl all sts
Row 5(RS): SL1 (P), * K2tog, SSK, P2 * repeat from * to * ………….. last 3 sts P2tog, P1
Now I have a total of 47 stitches remaining.
Row 6(WS): Purl all sts
Row 7(RS): SL1 (P), K1, SSK, * K2tog, SSK * repeat from * to * ……………….. last 3 sts P3tog
Now I have a total of 24 stitches remaining.
Row 8(WS): Purl all sts
Finally, pick up the remaining 24 stitches onto a darning needle and pull the yarn tightly to close the top. Then, sew up the seam to finish the hat.
Sunayana Lace Hat Knitting Video Tutorial
Show Off Your Hand-Knit Projects: We’d Love to See Them!
I hope you liked this lace hat knitting pattern! Let me know in the comments what you think.
If you’re working on any knitting project, feel free to share it with us on our Facebook page. I’ve also shared many other beautiful hat patterns on my website, so don’t forget to check them out!
Your Guide to Lace Knit Hats: Answers to Common Questions
Do I need to use circular needles, or can I use straight needles?
This pattern is designed for straight needles, but it can be adapted for circular needles.
What level of knitter is this pattern suitable for?
It is suitable for intermediate knitters, but confident beginners can also try it.
How do I decrease the lace hat?
Follow the provided decrease pattern to shape the crown.
How do I finish the top of the hat?
Pick up the remaining stitches on a darning needle, pull tightly, and sew the seam.

Hi Sunayana,
Thank you for the two hat patterns. I’ve been looking for awhile for like patterns and was thrilled to see your Twisted Cable Knit and Winter Lace hats pop up. Your patterns are very well written and seem like they will both be enjoyable to knit.
Thanks again, Betty
Is there a way to get a printable pattern?